The idea for the recipe I am sharing with you today came out of a conversation I had with my brother about my delicious Melt-In-Your-Mouth Dark Chocolate Brownies and talking with him about his daughter's love for all things mint. My niece's birthday was coming up, so I was telling him that I actually make a mint version of my brownies and offered to make them a batch or two for her 5th birthday party. Within about five minutes of agreeing to do that, I had already expanded the idea into making them a mint peppermint patty-like ice cream cake with my brownies as a base instead. They immediately accepted my offer.
I have been talking about this recipe with some colleagues and friends over the past few weeks and I've already had two people try it out with great success. So then, I began thinking to myself, "What am I, some sort of culinary genius?" Well, that may be a stretch, but both people who tried this recipe had rave reviews from their families, and I totally get why. I mean, who doesn't love chocolate and ice cream together? And, practically a brownie sundae in cake form none-the-less? Come on...it's just another one of those matches made in heaven! You literally cannot go wrong!
This recipe is so easy to make and is sure to be a crowd pleaser at your next get-together or party. You could make this recipe in a variety of different ways using flavors that suit your liking. Today, I am making a mint variation using mint chocolate chip ice cream and homemade mint ganache. But, you could easily use any flavor ice cream you wanted along with a plain chocolate ganache and have the same delicious results.
Here are some other flavor combinations you could try:
- Peanut Butter Cup. Peanut butter chip brownies with a peanut butter explosion ice cream and plain chocolate ganache.
- S'mores. Dark chocolate chip brownies with coffee ice cream, and plain chocolate ganache. After the cake has been frozen thoroughly and you're just about ready to serve, put small marshmallows on top of the ganache and put under the broiler for a few minutes to toast up the marshmallows.
- Raspberry. Dark chocolate chip brownies with vanilla ice cream and raspberry infused (using raspberry extract) chocolate ganache. Garnish with a ring of fresh raspberries on the top.
The options are really endless, just play with the flavors you like!
Peppermint Patty Ice Cream Cake
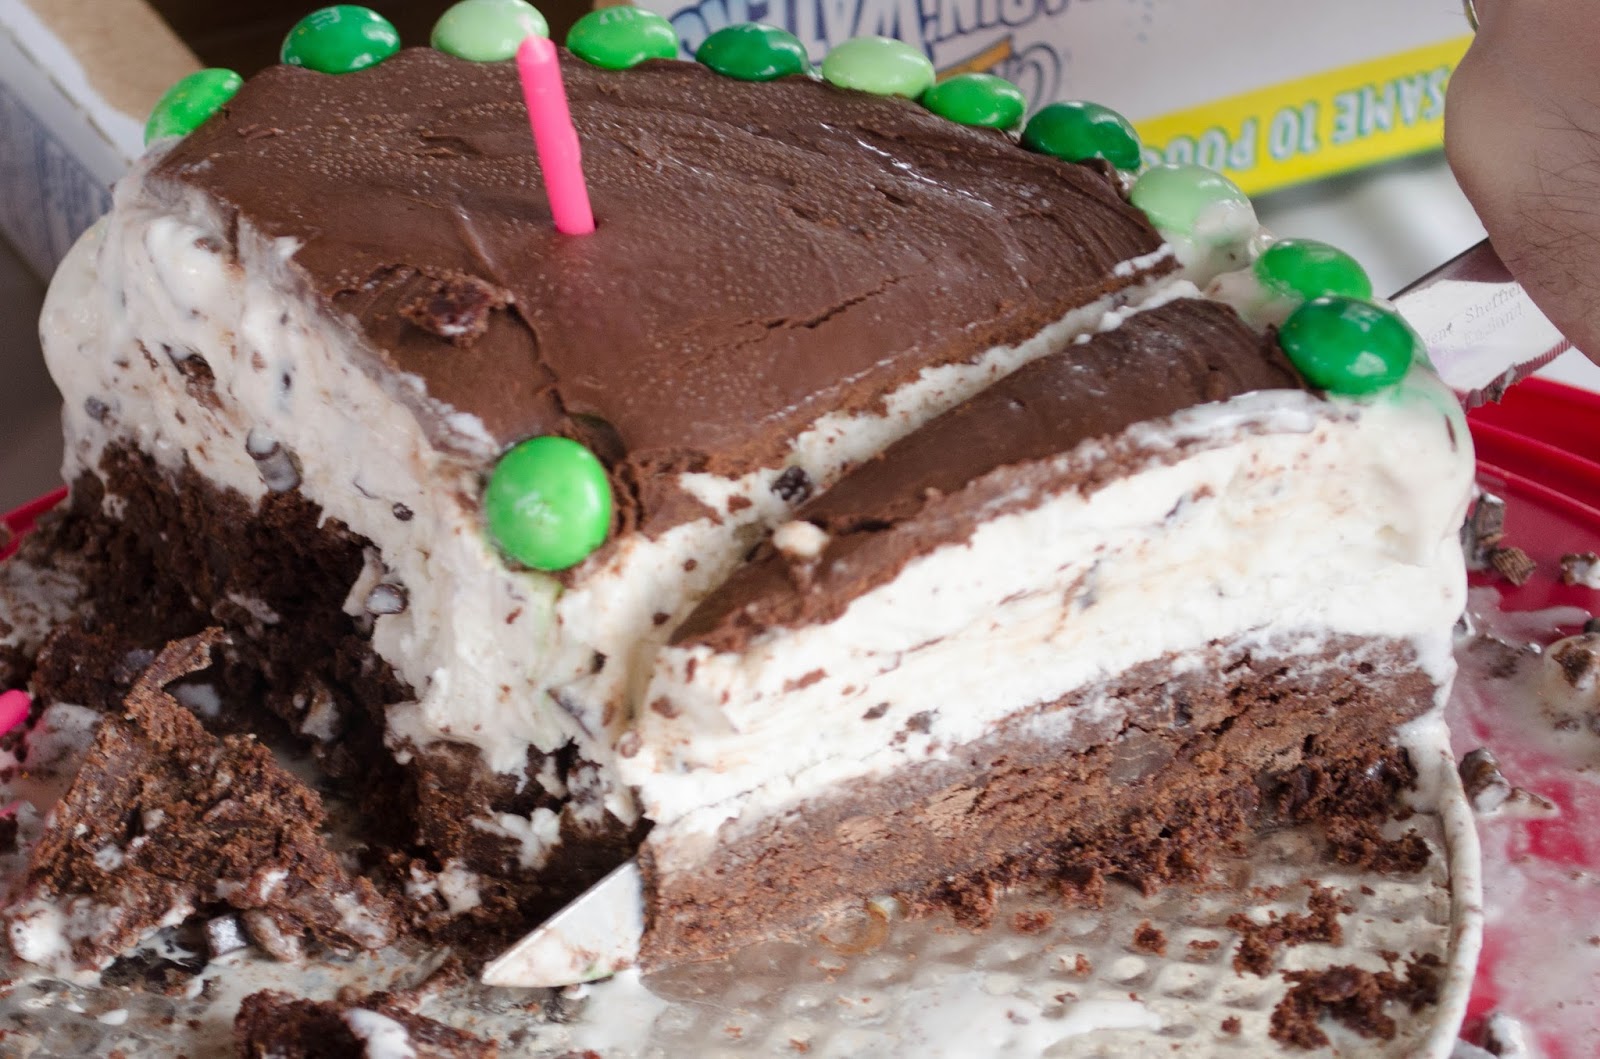
 |
| The finished ice cream brownie cake. |
1st Step – Brownie Base Layer
Ingredients:
8 tablespoons (1 stick) salted butter, room temperature, cut into 8 pieces
8 ounces gluten-free baking chocolate
1 cups sugar
3 large eggs, at room temperature, lightly beaten
1 cup gluten-free all-purpose flour, spooned and leveled
¼ cup unsweetened baking cocoa powder
½ teaspoon baking powder
1 cup dark chocolate chips
cooking spray
Directions:
Preheat oven to 350°. Spray 9-inch spring form pan with cooking spray. Set pan aside.
Place butter and dark chocolate chunks in a large glass mixing bowl. Using a microwave, melt butter and chocolate in 2 or 3 30-second intervals, stirring between each interval until chocolate is smooth and there are no lumps. (I recommend setting your microwave timer to only 30 seconds each time so that you do not burn the chocolate.) After the third heating interval there may be a few lumps left, just keep stirring until they melt down.
Add sugar, stirring until well combined.
In a small mixing bowl, whisk the flour, cocoa powder, and baking powder until combined well.
Add eggs to melted chocolate in the large mixing bowl, stirring to combine. Add all of flour mixture to the chocolate mixture. Stir until moistened, making sure not to over mix, about 15-20 strokes. Stir in chocolate chips. Transfer batter to prepared pan and smooth out with a rubber spatula.
Bake for about 25-30 minutes, or until toothpick comes out with a few moist crumbs. Cool in spring form pan for about 2 hours. Do not remove spring form from pan, you will need this in place for the next step.
 |
| Baked brownies cooling. |
2nd Step – Ice Cream Layer
Ingredients:
2 Breyer's Mint Chocolate Chip Ice Cream (1.5 quarts each)
Directions:
Let Ice Cream sit out for about 20 minutes to soften. Scoop out softened ice cream and spread evenly over brownies base layer until the ice cream reaches the top of the spring form pan. Once the spring form pan is filled with ice cream, cover with plastic wrap and put the whole pan in the freezer to set for at least 4-6 hours.
 |
| Ice cream layer added. (spring form removed to show layers) |
3rd Step – Mint Chocolate Ganache
Ingredients:
8 ounces mint chocolate chips
1/2 cup heavy cream
M&Ms Mint Candies for garnish
 |
| Mint chocolate ganache. |
Directions:
Pour chips into a medium sized glass mixing bowl and set aside. In a small saucepan, bring heavy cream to a boil. Once the cream has reached a boil, pour over chips in your mixing bowl and stir until smooth with a wire wisk.
After the ganache is made, remove ice cream cake from freezer. The ice cream should be hard and set completely before pouring on the ganache. Remove plastic wrap, but do not remove spring form from ice cream cake.
Pour ganache over the middle of the top of the cake and spread with a metal spatula. Spread ganache to within a quarter of an inch from the rim of the spring form pan. Garnish the edge with Mint M&Ms and then put the cake back in freezer to set for a few hours or overnight.
Remove cake from freezer and remove spring form from pan. Let the cake sit out for about 15-20 minutes before serving to let soften for easier cutting. The brownie will most likely still be frozen so you may want to use a metal knife heated under hot water before slicing.
 |
| The birthday girl gives the ice cream brownie cake two thumbs up! |
Serves 12.
This recipe is gluten-free, nut-free, and vegetarian.